Give a unique name to a USB flash drive or to a network drive on your local network
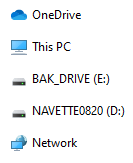 By default, manufacturers give all identical-model flash drives the exact same name. It's not an problem, but can become annoying if you have multiple drives plugged into your PC. As you can tell from the screenshot, I immediately know which of those two USB drives is my backup drive, so I don't have to click on each one to see what it contains. Nice and easy.
Rename a flash drive
 To rename your drive, plug it in and open File Explorer (Windows Explorer). When it launches, right-click on the drive in the navigation pane, and choose "Properties". The navigation pane is the area on the left, visible by default.
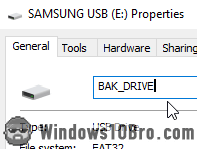 In the popup that opened, type the drive name you want in the text field: at most 11 characters long, and without any "weird" characters. If you stick to letters, numbers, hyphens (-), and underscores (_), you'll be fine. (And yes: I know that my label is misspelled. I like three-letter prefixes for my drive - don't judge.)
Click OK to assign the name you just typed to the USB drive. You may not see the new name reflected right away. No worries: safely eject the drive, and plug it back in. Windows will start using the new name used instead of the old one. Already when you eject the drive, a notification will display the new name: 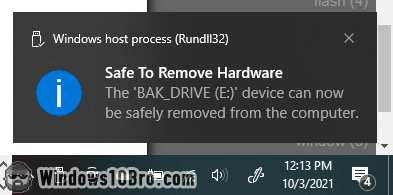
What about lower case names?
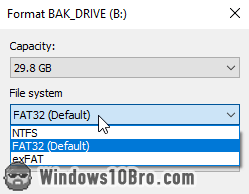 There are different ways Windows can store files and folders on USB drives: this is determined by the "file system". Each file system has pros and cons. By default, USB drives use the "
FAT32" file system: a downside of FAT32 is that it only allows uppercase drive names. You could use a different file system (like NTFS or exFAT), but doing so for drive-naming is really not a good reason.
Rename a network drive
If you've mapped a network drive, you can rename it to (pretty much) anything you want. There are special characters that you can't use, like colons (:) or slashes (\ or /), because they have a special use. To rename a network drive, just right-click on it in File Explorer, and choose "Properties".
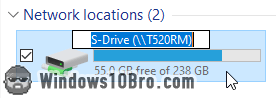 Windows automatically assigns a name to the network drives based on the letter you map it to, and on the host machine's path. To rename it, open File Explorer and click on that drive under Network locations.
Then, press the F2 key on your keyboard: it's the standard hotkey to rename files, folders, shortcuts, etc. You can also rename your network drive by slowly clicking it twice. Or you can right-click on it and choose "Rename". These three techniques work for any item Explorer or on your desktop - F2 is my favorite.
Extra tip for the road

Giving your drives a custom name is great, but it means that you have to stick the drive in to see what's on it. I know it's tedious, but labeling the external casing of your flash drives will make your life way easier. Your future self will thank you for the two minutes you start taking today putting that sticker on your flash drives!
 I personally use the Avery 5422 adhesive labels: they're the perfect size. Depending on the USB drive you use, you'll have to cut away part of the label. That's the case with my go-to, cheap-and-trusty SanDisk Ultra drives, because of their retraction mechanism.

