Change the name of your computer to something more meaningful
Your PC name lets you identify computers on the local network. Microsoft's "Find my device" service (similar to Apple's "Find my [iPhone]") lists your PCs by their computer name. And some apps rely on PC name to track which PCs and devices have logged-in. Example: under Account / Security, Dropbox lists all the PCs that recently accessed your account. As you can tell, these random PC names are useless. Security is one very good reason to rename your PC: 
PCs on your local network are listed by their "name"
If you open File Explorer (Windows Explorer) and click on Network in the navigation pane (it's the sidebar on the left), you'll see the names of all the PCs and printers on your local network. Here's what I'm looking at: 
The only two computers I see are my file server (an old ThinkPad T520 laptop), and the laptop I use to write these tutorials. The only reason I know this is because all other laptops are asleep, and therefore not showing. Otherwise, this cryptic name would be useless. Let's rename this laptop to something else.
Rename your PC
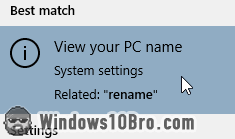
 To rename your PC, click on the start button (Windows logo) and start typing "
rename
".
Click on "View your PC name". This opens the About page in the Windows 10 Settings app. It breaks down your hardware profile: 
Click on the "Rename this PC" button: Windows will ask for the administrator's password (or ask you to confirm the action). Then, type a name that doesn't already exist for another PC on your local network. If you don't use a local network (or don't know what I mean by that), pick any name you like.
Only use letters, numbers, and hyphens (-) for your PC name. (Since spaces aren't allowed, use hyphens to separate words.) By convention, PC names are in uppercase letters; but the name isn't case-sensitive, use upper- or lower-case. 
I'm choosing a name that is descriptive ("tutorial laptop
", abbreviated). This new name is guaranteed to be unique, because I only bought one laptop for tutorials in July 2020. (HP was running a generous Independence-Day sale.) 
Click on the Next button. The progress wheel will spin a few times, and you'll see the following message: "After you restart, your PC name will change to [ your new PC name]
". Before clicking Restart now, close all windows and programs. Otherwise, click Restart later - I'll see you on the other side of the reboot.
Rename your PC from the command line
You can rename your PC from the command prompt via WMIC, but this has now been deprecated. The same restrictions on characters and length apply. I'm just using "OLD-NAME" and "NEW-NAME" as examples, type your own names:WMIC ComputerSystem where Name=OLD-NAME call Rename Name=NEW-NAME
With PowerShell, it's even easier:Rename-Computer -NewName "NEW-NAME"
View your current PC name
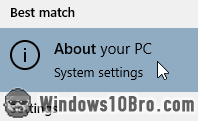
 Once your PC has restarted, it will show the new name everywhere. To confirm that, click on the start button (Windows logo), and type "
about
". Click on the "About your PC" result. This will open the screen we just saw in the Settings app. Look next to device name: 
You can also see your PC name by looking at the computers on the network. Notice that only the first 15 characters are visible. Windows 10 itself allows PC names longer than 15 characters, but "hostnames
" on the network only show the first 15 characters. This comes from an old technology (NetBIOS) and the need for backward compatibility. That's not an issue in my case because I'll only have one tutorial laptop connected to the network at any given time. 

