Change how long Windows waits before falling asleep, on battery or plugged-in
 If you haven't used your PC for a while, it will reduce its power consumption. First, it dims the primary screen and external monitors. (Your display nearly always consumes the most energy out of all built-in components.) Then, Windows will go to sleep: unlike shutting down, programs and opened files are preserved, but the PC suspends all operations. That's especially important for devices that rely on battery power. If Windows falls asleep too soon for your taste, you can change how long it waits before engaging sleep-mode while plugged-in or while running on battery.
Change how soon your PC goes to sleep
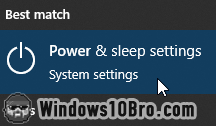 To customize your sleep timeout's duration, click on the start button (Windows logo) and type "
sleep
". Then, click on "Power & sleep settings".
This opens the Settings app. If you're using a desktop (vs. a laptop or tablet), you will only see one dropdown menu under Screen and Sleep. That's because you don't have battery life to conserve. I'm using an HP laptop, and the default power settings look like this: 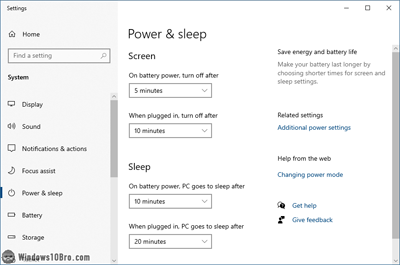
If you find that Windows falls asleep too fast, pick a longer duration in the "When plugged in, PC goes to sleep after" dropdown. If your device has a built-in battery, also pick a duration under "On battery power, goes to sleep after":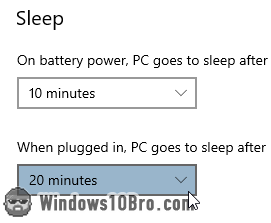
I find that on some laptops, Windows 10 never wakes up from sleep. This means that you have to do a hard reboot to regain access to your PC - essentially crashing Windows. On those laptops, I set the sleep timer while plugged-in to a few hours, or I even select "Never". (I'm nearly always plugged-in.)
 The sleep setting is applied as soon as you pick a new number of minutes or hours from the dropdowns. You can close the Settings window. From now on, Windows will wait the number of minutes you picked before going to sleep. But consider reading further for more insight and advice.
Prevent your PC from ever going to sleep
 In my experience, the more often a PC goes to sleep, the less stable Windows becomes. I've started setting my main PC to "Never" in the Sleep dropdown. This effectively disables sleep-mode for that PC. I don't recommend that you do this by default on your machine. But if you notice that some programs start crashing or become slow or unresponsive after waking up, start progressively raising your sleep timer.
Sleep timer while running on battery
When it comes to laptops and tablets, it's hard to give universally good advice. The ideal sleep timer, while your device is idle on battery, depends on (too) many variables. What brightness do you use? How large is your display? (The larger the screen, the more power it uses.) You have to try different settings. You can also change how much power your PC uses while on battery power. 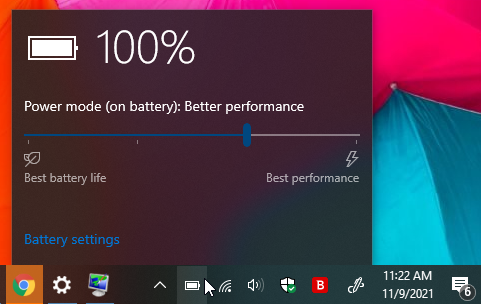
Manually put Windows to sleep
Windows automatically goes to sleep. However, if you know that you're stepping away from your computer for a while, you can manually put your PC to sleep. To do so, click on the start button (Windows logo) to open the start menu. Then, click on the power icon, and select "Sleep" from the popup menu: 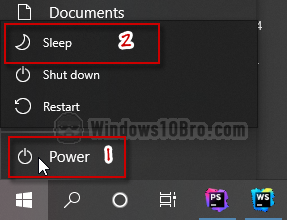
Adjust your screensaver's timer
Windows 10 doesn't use a screensaver by default, but the functionality is still there. If your PC goes to sleep too quickly, the problem could be a screensaver's timeout value. You can change the amount of time before your screensaver kicks in. Unlike the sleep setting, you can pick any number of minutes you want.
Click on the start button (Windows logo), type "screensaver
", and click "Change screen saver". When the popup opens, look at the "Screen saver" dropdown: 
If the dropdown says "None
", you have no screensaver enabled, and you know that this wasn't the issue. If a screensaver is selected in the dropdown, you can change the number of minutes the screensaver will wait before starting: 

